Ultimate Guide To Live Streaming
Everything you need to know about Live Video Streaming in our Ultimate Guide. Discover what equipment you will need, how much it will cost, and how to get the best results using it.
What is Live Streaming ?
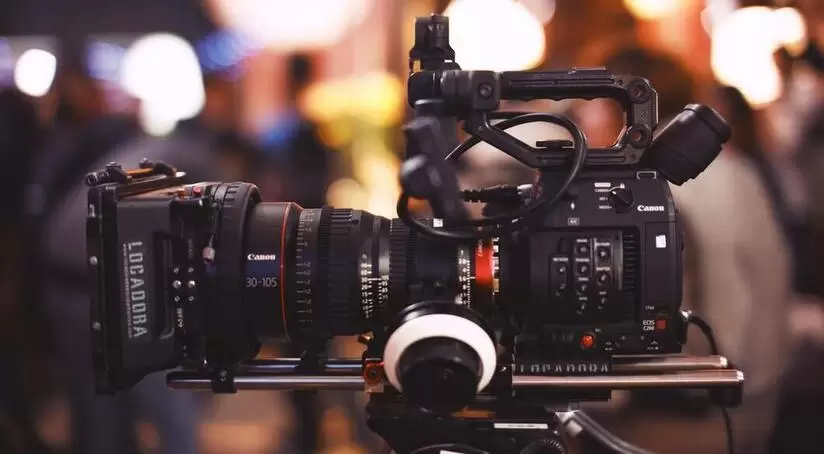
Live streaming is broadcasting live video over the internet to viewers from a huge range of devices including your phone, a tablet, games console, webcam, PC, laptop, DSLR camera, and video camera
In this ultimate guide to live streaming we will lead you through the process of gathering everything you need to get started and pointing out a few tips and tricks to help you on the way with your first Live Streaming adventure.
We will guide you from the simplest Facebook and smartphone stream, to a professional setup that could be used on a live event such as a wedding, a music performance or any other larger scale event you can think of, including using multiple cameras.
-
Plan, Plan, Then Plan Some More
-
Who, What, When, Where, Why?
-
The Equipment You Will Need
-
Setup And Preparation
-
Live Streaming
Plan Your Live Streaming
A successful video live streaming event isn’t going to happen by accident. Simply turning on your equipment and hoping things work out is a disaster waiting to happen, and that’s definitely not the objective we are aiming for.
Can you imagine what any popular TV show would be like if no advance planning was done? It would be a complete mess and unwatchable.
It’s the same for your own live stream. Unless you plan it in advance you will most certainly fail to gain and keep an audience, and if no-one wants to watch your output what is the point of doing it in the first place?
OK, now we have agreed that to achieve our goals we need to plan for them, what do we need to do?
Who Are Your Audience?
Perhaps a little obvious, but knowing who you are trying to reach will have a bearing on how to prepare for your live streaming efforts.
There’s not much point broadcasting a tutorial on how to prepare roast beef dinners to an audience comprised of vegetarians.
Keep your content informed and relevant to those people you are hoping to engage with.
What Topics Will You Be Live Streaming?
Unless you are simply going to open your mouth and see what tumbles out it would be wise to decide beforehand what the nature of your live streaming is all about.
It won’t be easy to attract an audience if they don’t know what they are joining up to see and hear. Your competition is fierce so give yourself a chance and prepare your subject matter in detail.
Set an overall time limit, allocate slots for various subjects, and allow time for any guests to have their say. Make sure you are well informed and ready to keep the flow of the stream going.
Dead airspace while you try and think of something to say is not good.
Do your homework, then do some more, and when you think you have it nailed, do a little bit more and then decide on a great title.
When Is The Best Time For Live Streaming?
Different folks are online at different times so take into consideration the timing of your stream to reach the maximum number of potential viewers.
There are no hard and fast rules but a quick internet search will tell you when broad demographics of users are online and your own local knowledge will come into play.
If your content is targeted at an international audience give some thought to time differences between countries.
Even mainland Europe is at least one hour ahead of us here in the Scotland.
The bottom line is that your target audience is your number one consideration and if the actual live event they want to see begins at 7pm, then it sort of settles the time you will be live streaming.
Take nothing for granted and double check everything about your schedule.
Where Should You Livestream From?
Where you broadcast your live streaming content from is your personal choice and may be dictated simply by what space is available.
Ensuring the venue you use has a stable internet connection is the number one priority.
Without a reliable connection you face buffering problems (when the picture and sound stutter or freeze) or the stream drops out entirely and cuts off all viewers.
The tolerance of your audience will evaporate quicker than snow off a dyke in the sunshine if your live streaming buffers and breaks up frequently.
The room you are setup in should be a calm space with as little outside noise penetration as possible. You don’t want your broadcast content interupted by other random sounds.
It is annoying and will reduce the enjoyment of your viewers having to contend with extraneous sounds not relevant to your content.
Keeping your live streaming environment interuption free is an obvious point, but unless an active decision is taken to secure your space the risk of an unexpected and potentially embarassing interuption is always possible.
Of course, if you are live streaming a wedding or music event or some other gig or performance a quiet space is irrelevant and a whole different set of preparations need to be considered.
Whatever the event, do your homework, then do some more, then check it all again..
As we are all only too well aware – if something can go wrong it most likely will do if we don’t take steps to mitigate against it.
Be prepared !
Where To Livestream To
This doesn’t really mean which towns cities and countries to broadcast to, but which live streaming platform to push your content onto, and the choices are spectacular with dozens to choose from.
Some are well known and others not so familiar, but each platform has its audience and you will be wise to at least give some of them a quick check.
Facebook, Youtube, Twitch, and Instagram are a handful of the most popular but there are many many more. We will look at how to reach some of them in detail further down the page.
Why You Should Live Stream.
Especially during Covid-19 restrictions on meetings, gatherings and travel, a live streaming event allows people who would not otherwise be able to participate and enjoy your service to take part and connect as part of the community.
You can also record your live streams and make them available as video-on-demand for anyone who misses the live streaming.
This is a great way to to preserve the event experience forever and allows those who might miss the original live streaming to watch it later in their own time.
What Equipment Will I Need For Live Streaming?
Overview:
Video and audio sources
These are cameras, computers, and other devices and image sources, as well as microphones, audio mixers, and other sound equipment to produce the output of the livestream.
A video encoder
This is the software or hardware device that packages real-time video and prepares it in a digital format suitable to send over the internet.
Cameras
This can be as simple or as sophisticated as you want it to be and your intended end result will be your guide and influence.
At the entry level your smartphone will do the job. Login to Facebook and set it up in a few minutes. If this is your choice the most important tip we can pass on is to invest in a tripod to hold your phone.
Shaky video becomes unwatchable after a very short time and no-one will be impressed. Your audience will simply disappear. Use a tripod and avert the problem.
Moving up through camera possibilities you could use a webcam, a tablet or iPad, a DSLR hand-held camera or any number of differing video cameras with various capabilities.
We will look at various cameras a little later but first we will detail what has to be done with to actually capture camera output and make ready that output for broadcast over the internet.
How To Capture Video And Audio.
To stream online you need to capture the video from your audio and video sources and the usual way to do so is via an HDMI or SDI cable.
Of course the exception to this is when doing simple live streaming with a smartphone where the phone is connected directly to the single platform the stream is broadcast on via wi-fi or phone data, for example, Facebook Live.
These simple live streaming events are limited in scope but very easy to setup. Our focus is mainly on slightly larger scale although relatively easy to setup processes with better quality cameras and sound recording equipment.
Lighting
Regardless of how many cameras and microphones you are using your lighting needs to be top quality or you just won’t get the results you hope for.
There are more books you could read in a lifetime on the subject of lighting and we don’t intend to get into the fine detail.
Suffice to say you should ensure you have enough lights to standardise the effects on all participants and areas of your live streaming.
Overly bright areas and corners of dark shadow don’t make pleasant viewing. Take a little care to setup your lighting so that everything is lit as evenly as possible.
Avoid whiting out a face due to too much direct light and watch out for face shadow caused by careless side-on lighting.
LED lighting is relatively cheap and effective, and you can have mains or battery powered equipment that doesn’t need to cost an arm and a leg.
We have grown our own lighting rigs over a period of time and have dozens of lights for every occasion in-house and an equal number of portable setups we can move around various external live streaming locations.
You can start simply with a couple of lights and expand as your needs grow. Some video cameras have built-in lights but take note as the distance between the camera and subject increases so the effectiveness of the camera lighting lessens.
Basic Live Streaming Equipment Setup

The basic live streaming infographic above shows a simplified workflow to establish a live streaming broadcast.
Sound and picture are produced, then sent to a capture device or encoder, passed to a computer, and then onto the live streaming platform on the internet to be seen by your viewers.
This is the essence of live streaming and should things start to get a little complicated with your live streaming events just think back to this baseline and take each component part separately.
Let’s take each part individually and examine what you need to get started successfully.
Picture And Sound
A single camera is obviously a basic requirement, but it is relatively easy to setup multiple cameras to get different viewpoints and switch between them during your livestream.
We will assume two cameras for this ultimate guide and also independent sound capture via strategically placed microphones.
Most cameras have built-in microphones but the reproduced sound quality is almost always bettered by independent microphones which don’t necessarily need to be expensive varieties.
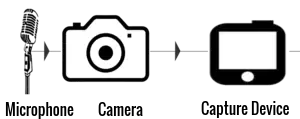 So, remembering the basic live streaming graphic, the first phase is microphone and camera to capture device.
If you decide to go with your camera’s on-board microphone this is a straight forward connection from your camera to your capture device or encoder (more about this in a moment).
If however you are aiming for better sound quality with more balance and control we recommend you connect your microphones to an audio mixing desk, and feed your camera pictures and balanced sound to your capture device or encoder separately.
There are many reasons for adopting this approach the most obvious is the control you gain in your live streaming sound output.
Different sound sources can vary in intensity. A simple example is two people with different natural speaking volumes.
An on-board camera microphone may have difficulty balancing the sound effectively whereas an independent microphone passed through an audio mixer allows you total control over your output.
How often, especially in recent times with more remote guests on radio and TV shows have you heard seriously wonky audio that is full of echo, lacks clarity and ultimately lessens your enjoyment?
Don’t let anyone say about your live streaming event that it was a great show but the sound quality was not very good.
What Is A Capture Device Or Video Encoder
Most video sources like cameras aren’t usually ready out of the box to produce web-friendly formats. They are naturally designed to record large video files.
A capture device or video encoder is the software and hardware that converts incoming sound and picture signals into the required internet-friendly format.
Your choice of equipment here is huge and you can expect to pay anything from around £100 up to several thousands depending on what you are trying to achieve and what scale of event live streaming you are broadcasting.
To capture and livestream your gameplay from your console onto for example the Twitch platform, all you really need is a capture card and our choice in this situation is the Elgato HD60S at around £150.
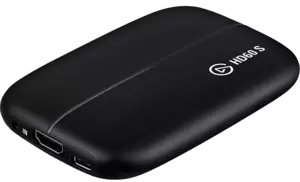
HDMI cable from the console to the Elgato card, and out from the card to your computer. Very simple and effective.
To capture and display multiple cameras and sound a more sophisticated setup is required.
Before pushing output to the capture card you may choose to feed your camera pictures and balanced audio sound into a video switching unit.
This allows you to switch between cameras as you broadcast and show different angles and participants during the livestreaming.
Once again your choice of equipment here is huge. Our choice was the Roland V1HD but you have lots of options depending on your requirements and budget.

The Roland V1HD came in at just under £1000 and allows us to connect and switch between four different video sources (cameras).
Our audio from the various microphones feeding the audio mixer is also plugged into the Roland.
The output can then go directly to the capture card but in our case we have added another element between the Roland and the Elgato which is a direct recording preview monitor called a Black Magic Design monitor.
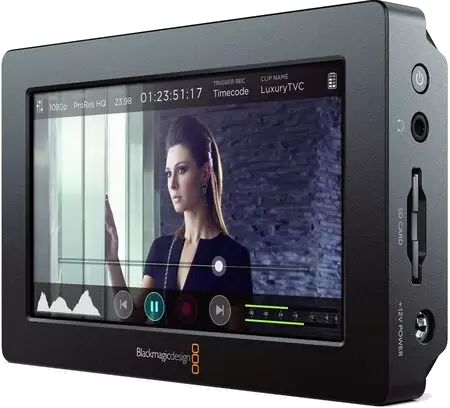
The Black Magic allows us to both record our livestream and check exactly what we are broadcasting via which camera to the internet. This isn’t absolutely necessary but affords us a more professional approach and aspect of quality control.
This is especially effective when we are at a remote location and don’t have access to the array of large monitors we have in our own venue.
Getting Ready To Broadcast To Your Chosen Platform
Having readied our sound and chosen our video input and output sources we are now almost ready to push our content out to the internet.
Firstly we feed our output into our control PC or laptop where we have chosen software to help us control our show. Synchronising the sound and picture outputs is vital here.
In simple terms sound will travel quicker from your microphones to your master controls than video will. You will most certainly need to make a small adjustment of perhaps 100ms so that mouths are moving in synch with the actual sound being heard in the live streaming output.

Master Control Software
Our choice of master control broadcast software is the fabulous and free OBS Open Broadcaster Software. This fantastic software allows us fine-tuning control of our output at a granular level and also records our live streaming output as we go in real-time.
Tweaking your content as it happens is a breeze and we wouldn’t do without OBS. However, there are lots of options for you to choose from and a quick Google search for Live Streaming Software will produce plenty of results and options for you to consider.
FREE is a magical word and in this case it definitely does not mean lower quality. OBS Open Broadcast Software is a mature and fully fledged product equal to anything else we have found and is a key component in our setup.
It is customisable, intuitive, and there is a lively and helpful community resource to help out with anything you need to know.
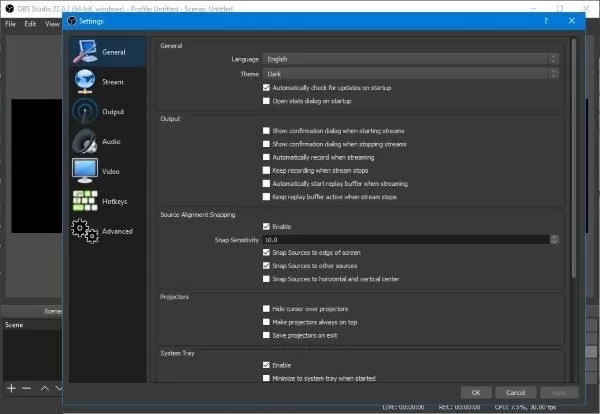
We can’t speak too highly of OBS as we have used it ourselves without any major problems for more than a year and will continue to do so.
Our live streaming takes place both in our own premises where we have a static setup and we also do live streaming from other venues, particularly weddings where it’s essential our equipment is reliable and won’t let us down.
Swapping out a misbehaving component is fairly easy in-house, but at a remote venue where we can only carry a finite number of spares means we need to have confidence in our chosen equipment.
OBS certainly meets our needs in every department.
Live Streaming
After all the preparations and setup and practice it is finally time to get going. Now you connect OBS (in our case) to the Live Streaming platform of your choice. Twitch, Facebook, Youtube or any of the multitude of others available.
At this point we should point out that you can supercharge your live streaming with a web-based platform that can send your live stream to multiple live streaming platforms simultaneously, thus giving your viewers lots of options to connect with and enjoy your content.
Without such a service live streaming to more than one platform at a time is very difficult and to all intents and purposes not really possible.
But with the restream service it becomes very easy.
Our final step is an account with restream.io. We send our single stream to Restream and they send it onwards to multiple platforms at the same time.
There are both FREE and subscription plans to choose from.
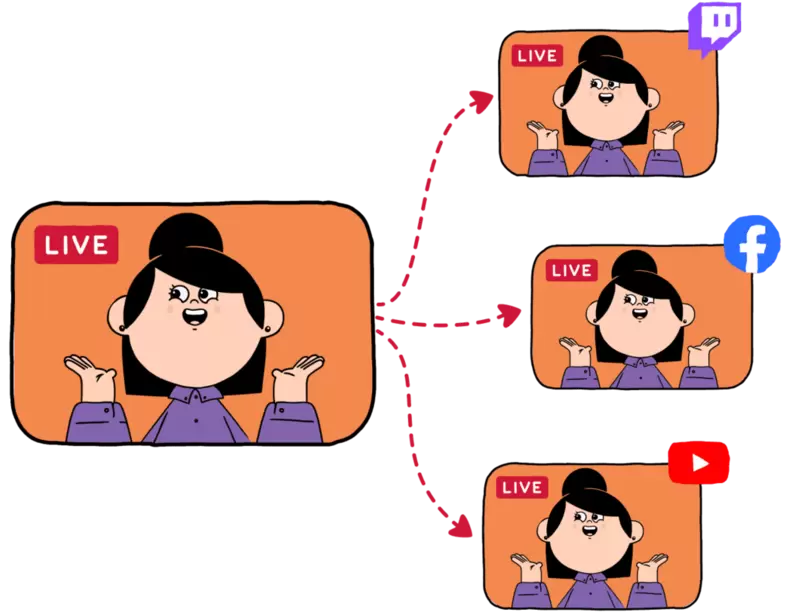
Restream can also store your live streaming broadcasts online for a period of time and you can download them back to your local setup.
A little thought here and it’s easy to see how we have introduced several different methods of achieving our intended results via multiple methods simultaneously.
For example, whilst live streaming our show we have recorded it in three separate places all at the same time.
We have captured and recorded on our Black Magic Video Assist Preview Monitor, into the OBS Open Broadcaster Software on our computer, and also via Restream.
This ensures we will always have backups when required, and particularly in the case of a wedding event we can rest easy knowing we have taken every possible precaution to ensure the big day goes without a hitch, including the hitching of the bride and groom !
Cost Of Equipment
How much will all of this equipment cost?
There is no quick answer because of the variables involved and your particular personal choice of equipment will determine your overall expenditure.
Cameras
We use two main video cameras costing almost £2000 each plus two DSLR’s at £1000 each for an outlay of £6000.
Our Roland v1HD cost around £950 as did the Black Magic Video Assist for an £1800 total.
Laptop and PC, £3000.
Lighting £600.
Tripods £700.
Microphones £300.
Sundry equipment (cables, connectors, various smaller units, spare batteries) £800.
Our overall outlay is somewhere in the region of £13,000+ but of course you may spend even more or find solutions at lower prices.
There are no hard and fast rules here and value for money balanced against the end product is what is most important.
We would love to hear of your setup and how you approach live streaming.
If you have enjoyed our article please drop us a line with a comment or two.
CLICK HERE TO CONTACT US FOR MORE LIVE STREAMING NEWS
